
Pathomation offers a comprehensive platform with a variety of technical components that help you build tailor-made digital pathology environments and set up custom workflows. Centered around PMA.core, our powerful tile server, everything else can be connected and integrated. You want a feature that PMA.core does not support or you have a script/code to implement it. Great! You can.
PMA.core allows the registration and execution of third party command line scripts via its External Scripts admin page and its Scripts Run API. You can utilize this to create anything you need from simple workflow tasks like batch renaming/moving of slides to fancy AI and tissue recognition algorithms. Assuming you have found one such a fancy script and you want to integrate it into PMA.core let’s see the process step by step.
Preparing for integration
As an example we will use the sample script (provided here) that recognizes tissue automatically using the OpenCV computer vision library and imports the recognized areas as annotations all in one go. The sample tissue recognition script requires Python and OpenCV to be installed and configured in your system. That script also requires some parameters to be executed successfully like the PMA.core server url, username and password and the path to the slide to analyze.
For this reason we will create an intermediate .bat file to facilitate the execution of the python script with the correct parameter values as described bellow(replace \path\to\script with the path the script is located).
python.exe "\PATH\TO\SCRIPT\AutoAnnotator.lite.py" -l %2 -u %3 -p %4 -t %5 -f %1Registering a script
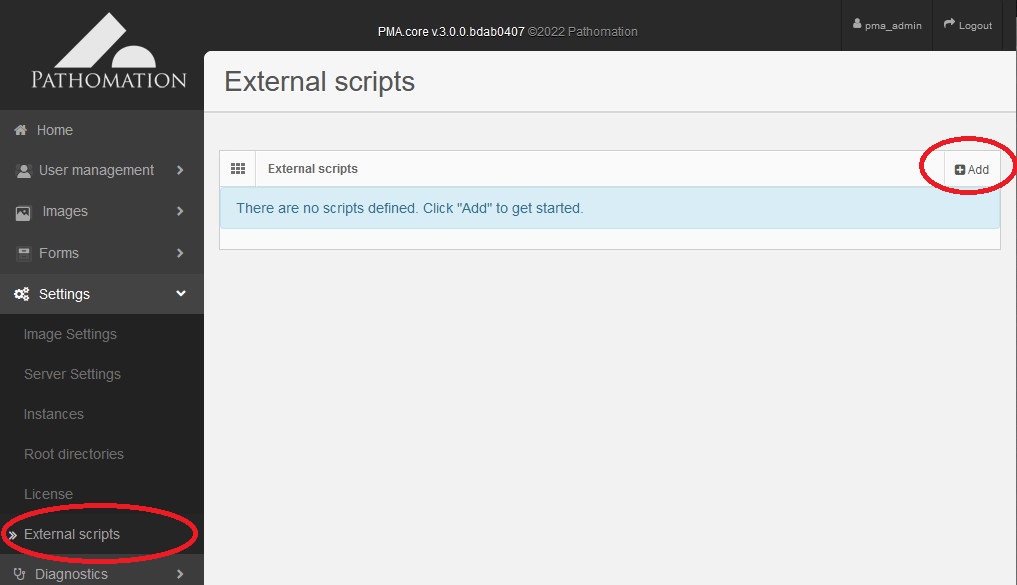
To register your script with PMA.core navigate to the Settings -> External Scripts page and click Add.
You need to provide the following information describing our script and the parameters required to execute it.
- Name: A unique name for the script used to fetch it and distinguish from other, for our example enter Automatic tissue annotations
- Command: The command line to execute, a bat file, cmd file or exe, for our example enter \path\to\script\AutoAnnotator.bat
- Arguments: The arguments passed to the script, for our example enter {slidePath} {serverUrl} {username} {password} {targetDirectory}
- Parameters: A dynamic list of parameters passed to the script by PMA.core, for our example enter the list of parameter as shown in the following image.
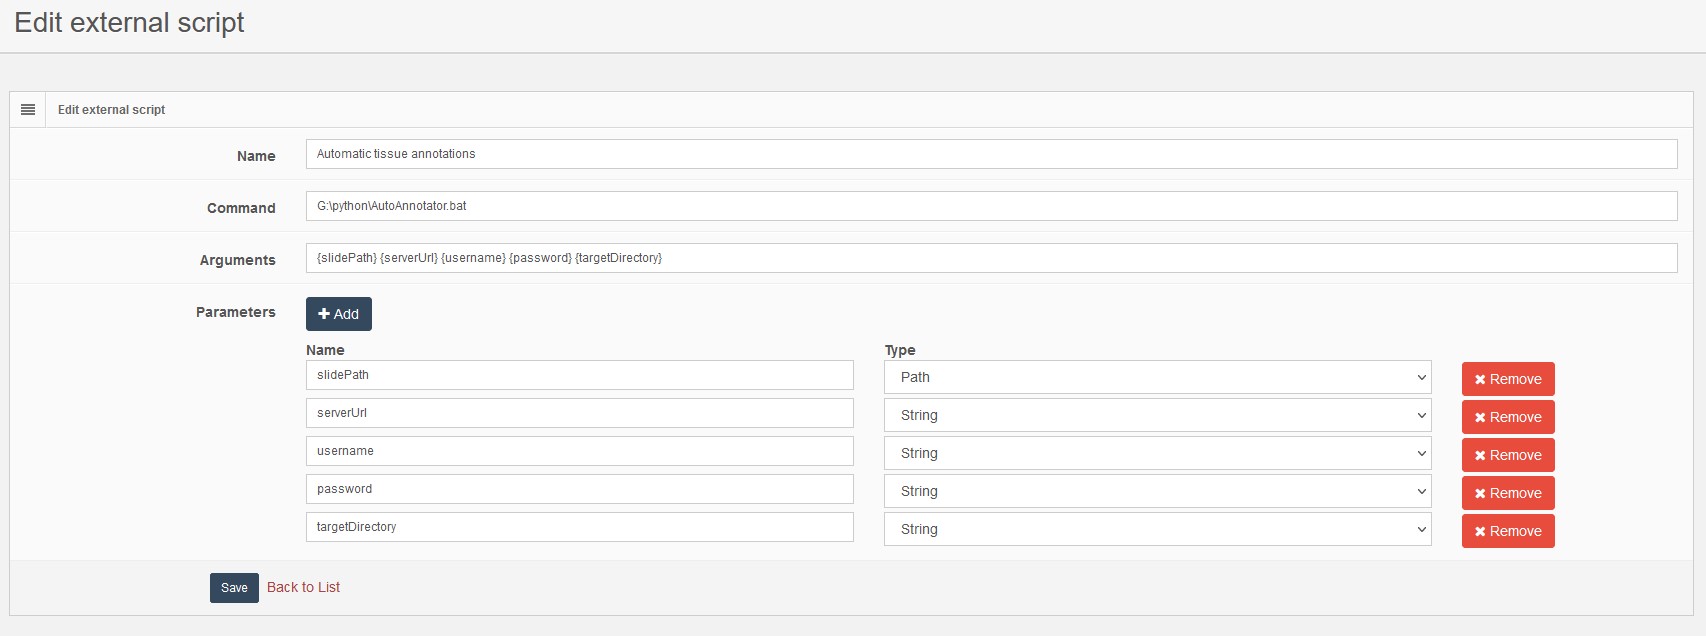
In the arguments section any text you enter will be passed to the executed command as is. An exception to this is the text enclosed by curly brackets (for example {slidePath}). If the text inside the curly brackets equals a parameter name, PMA.core will replace it with the value supplied at the execution step. PMA.core supports three types of parameters that validates accordingly at execution phase: String, Number, Path. Number parameters are validated as a floating point value, and Path is validated by checking the existence and permissions of the specified value.
After clicking Save you should see your newly created script and its settings in the main index page

Executing the script
Now that we have registered the script correctly we can execute it using the Scripts Run API. In the index page of the interface on the url column you can copy/paste a helper url with all the required parameters to execute the script. In our example the helper url is:
/scripts/Run?name=Automatic tissue annotations&slidePath={Path}&serverUrl={String}&username={String}&password={String}&targetDirectory={String}
and we will replace {Path} in slidePath with the virtual path to the slide we want to annotate, the {String} in serverUrl with the PMA.core serverUrl, the {String} in username with our PMA.core username, the {String} in password with our PMA.core password, and the {String} in targetDirectory with the path to a local temporary folder.
After executing the script using the API you will get a JSON response with the following fields:
{
"ScriptName": The executed script name,
"Success": A boolean value indicating whether the script executed successfully or not,
"ErrorMessage": An optional error message if any occured,
"Result": The output of the script
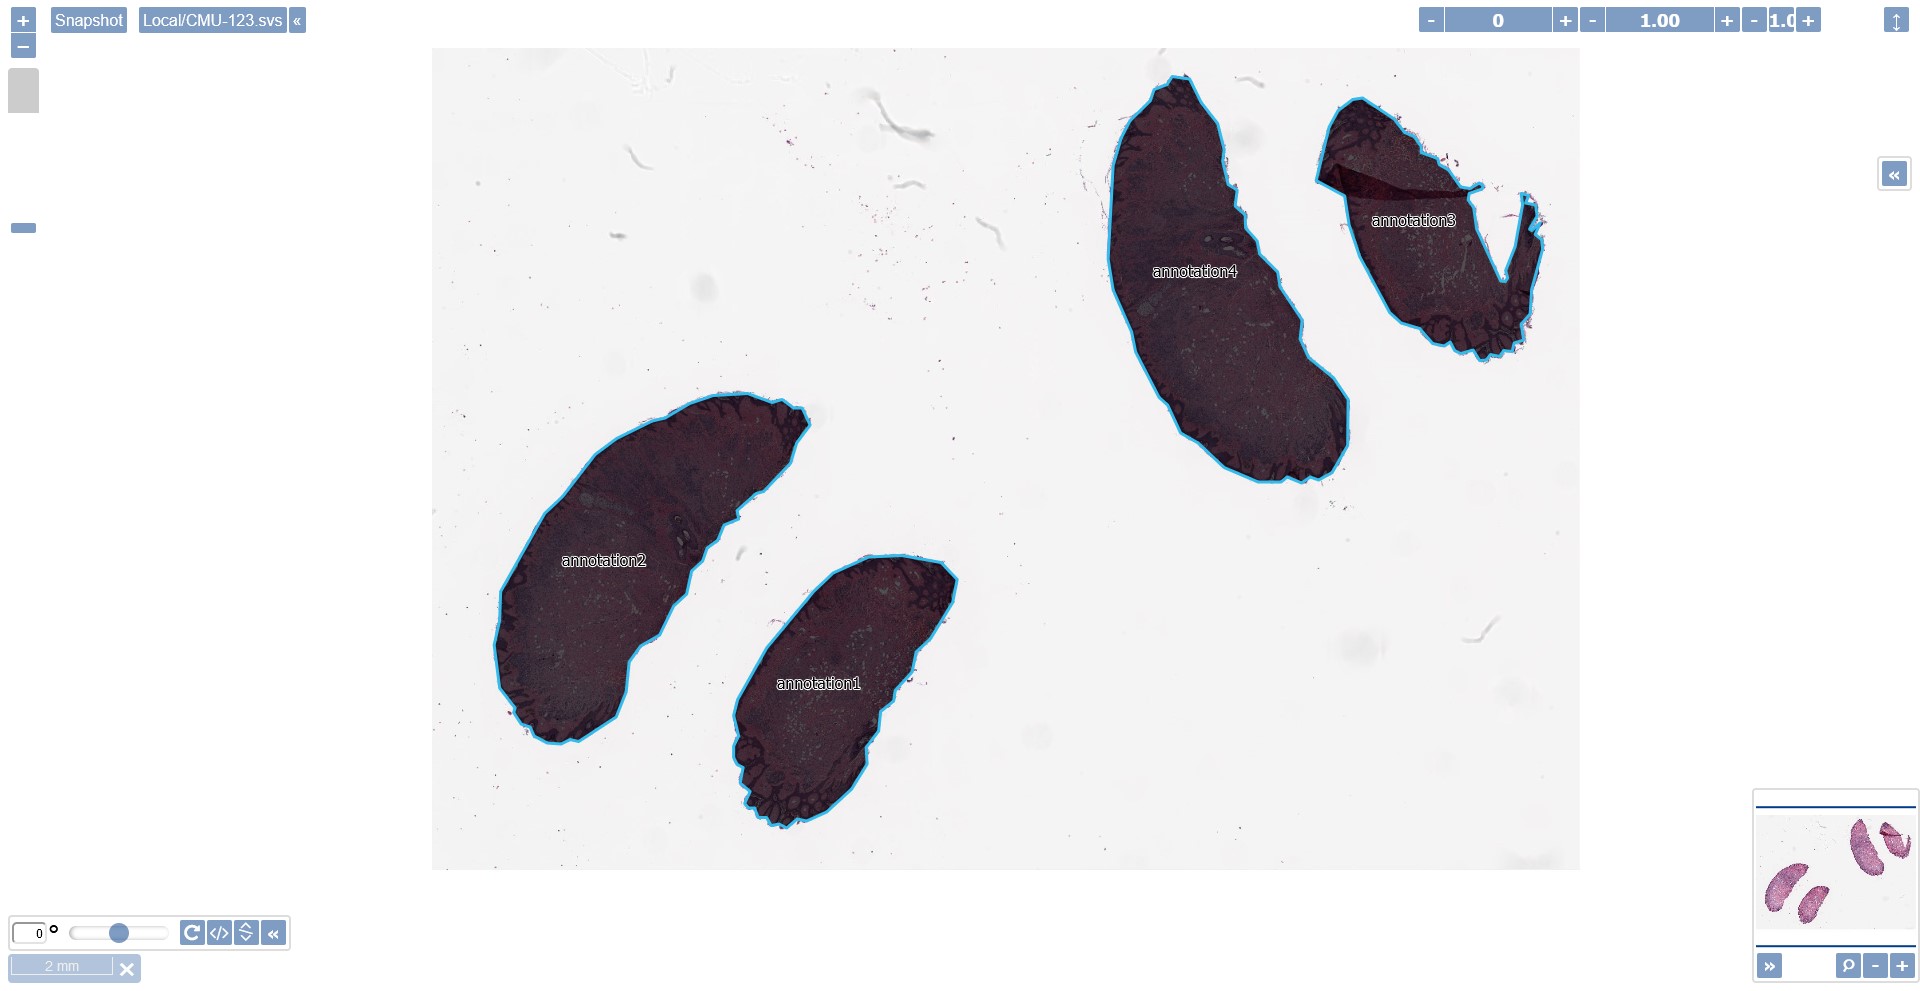
}After a successful execution of our script in a sample slide you should be able to see the generated annotations containing the tissues as recognized by the script’s algorithm.
Required files
Automatic tissue recognition python script (AutoAnnotator.lite.py)