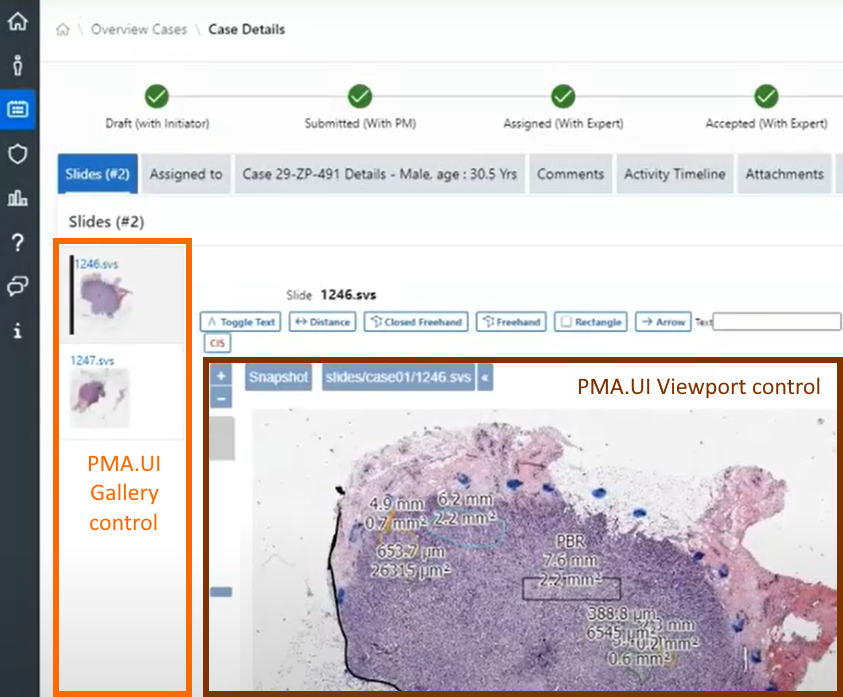
Syncing viewports across different users
Ever wanted to be able to have one user at the driver’s seat while others are watching, each looking at their own screen, just like with multi-head microscopes but over the internet? This can probably be accomplished with a screen sharing & conferencing tool, but the image quality results may be poor. How about allowing all users to take over the viewport at the same time? Drawing annotations simultaneously? Allowing users to share multiple viewports? Have this functionality in your application? It gets more complicated now, right? Wrong.
PMA.live enables exactly this functionality out of the box and can be integrated in your application without a lot of coding or complicated setup procedures. How does it work and why is it more efficient than your traditional screen share? Because PMA.live tells connected clients which tiles to download, and each client then retrieves said tiles directly from the tile server. This is more efficient and elegant than to broadcast pixels.
The ingredients you need are:
- PMA.core – Where digital slides come from
- PMA.UI – the UI Javascript library
- PMA.live – Pathomation’s collaboration platform
In the page where we want to add collaboration functionality we need the following JS libraries included:
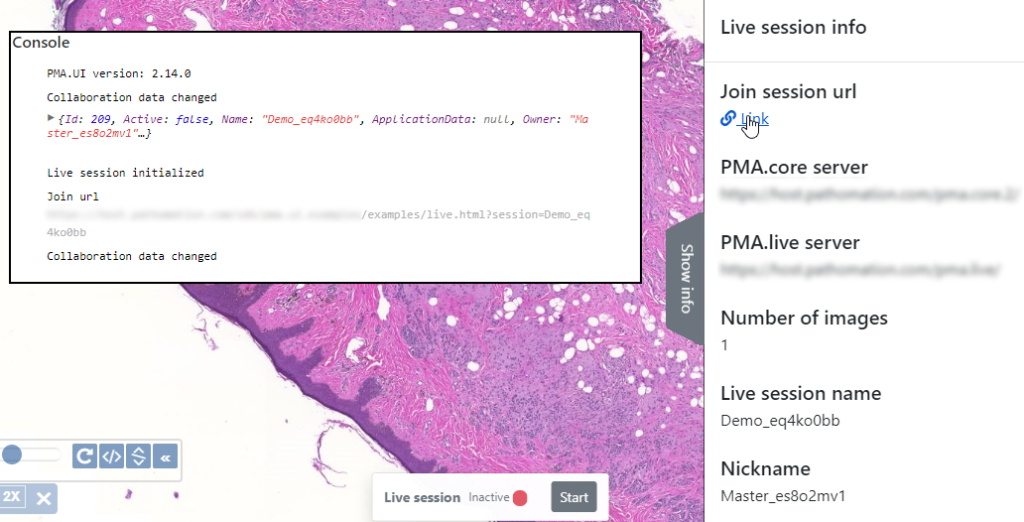
Let’s start by syncing a single viewport. In the PMA.live terminology, enabling users to collaborate with each other by looking at the same slides is called a session. Therefore, a user must first create a session which the rest of the participants have to join.
The first step is to establish a connection to the PMA.live backend:
Collaboration.initialize(
{
	pmaCoreUrl: pmaCoreUrl,
	apiUrl: `${collaborationUrl}api/`,
	hubUrl: `${collaborationUrl}signalr`,
	master: isMaster,
	dataChanged: collaborationDataChanged,
	pointerImageSrc: "pointer.png",
	masterPointerImageSrc: "master-pointer.png",
	getSlideLoader: getSlideLoader,
}, [])
The initialize method tells to the PMA.live Collaboration static object where to find PMA.core, PMA.live backend, whether or not the current user is the session owner, what icons to show for the users’ and the master’s cursor and accepts a couple of callback functions which we will explain later.
Once PMA.live has been initialized, we can continue by either creating or joining a session:
Collaboration.joinSession(sessionName, sessionActive, userNickname, everyoneInControl);The joinSession method will create a session if it does not exist and then join it. If the session doesn’t exist, it is possible to specify whether or not it is currently active and if all users can take control of the synced viewports or only if the session owner can do this. Once the session has been created, only the session owner can modify it and change it’s active status or give control to others.
In order for PMA.live to be able to sync slides, it has to know the viewports it should work with. In this example, we will first create a slide loader object:
const sl = new PMA.UI.Components.SlideLoader(context, {
				element: slideLoaderElementSelector,
				filename: false,
				barcode: false,
			});
Now let’s tell PMA.live that we are only going to be syncing a single viewport:
Collaboration.setNumberOfImages(1);Now let’s go back to the implementation of the “getSlideLoader” callback that we used during the initialization of PMA.live. This function will be called by PMA.live when it needs to attach to a viewport in order to control it. So the implementation in this example looks like this:
function getSlideLoader(index, totalNumberOfImages) {
	return sl;
}
We just return the one and only slide loader that we instantiated earlier.
Finally, let’s talk about the “collaborationDataChanged” callback. PMA.live uses SignalR and the WebSocket protocol to achieve real time communication between participants. Besides the out of the box slide syncing capabilities, it gives you the ability to exchange data between the users, in real time. This could be useful for example if you wanted to implement a chat system on top of the session. Every user can change the session’s data by invoking the Collaboration.setApplicationData method. It accepts a single object that will be shared among users. Whenever this method is called, all other users will receive it through the collaborationDataChanged callback, which looks like this:
function collaborationDataChanged() {
	console.log("Collaboration data changed");
	console.log(Collaboration.getApplicationData());
}
Summing it all up, PMA.live provides an easy way to enable real time collaboration between users. It takes away the burden, of syncing data and digital slides, from the developer and allows you to focus on the integration of the Pathomation toolbox in your application.
You can find a complete example of PMA.live here.