Custom panels and functionality in PMA.studio

Because sometimes you want more

PMA.studio has a lot of functionality out of the box, but sometimes you want more. Having PMA.studio open on one screen and your organization’s (AP)L(I)MS on another is not always ideal. And what if you don’t have multiple screens?

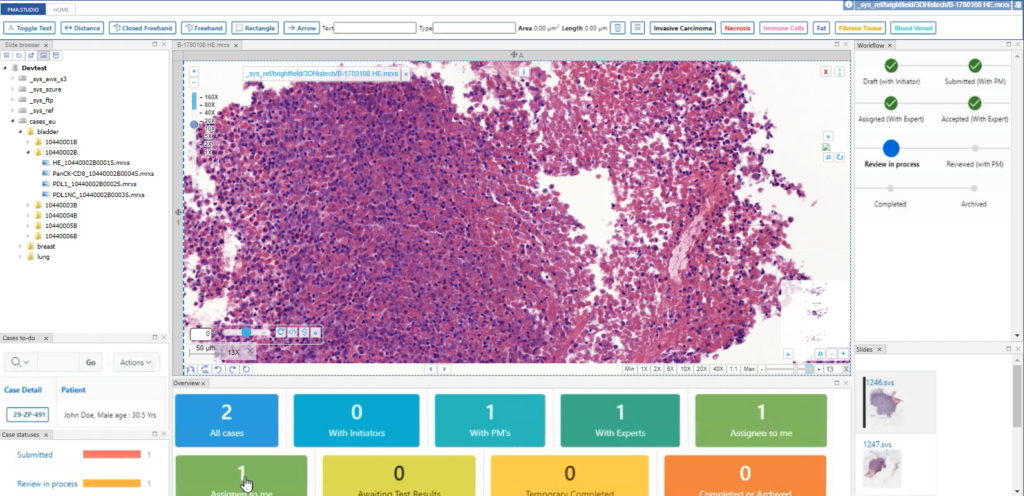
As we pointed out before, PMA.studio offers a panel-based layout. The standard panels can be moved around and even stacked. The standard ribbon in PMA.studio offers some convenient default layouts, too.

Further configuration of PMA.studio is available through the Configure tab, where you can enable individual panels.

But what if you can’t find the panel that you’re looking for? Maybe the content that you’re looking for is at a different website, and if you just could have that particular page available withing PMA.studio as a separate panel…

Custom panels

PMA.studio offers the possibility the add a custom panel w/ select content from a particular URL.

Let’s say that you want to have a reference website available next to your slide content. We’ll use our own PMA.studio wiki website at https://docs.pathomation.com/pma.studio as an example.

You could start by pulling up PMA.studio in one browser, and our wiki in another browser. You start off nice and smooth like this:

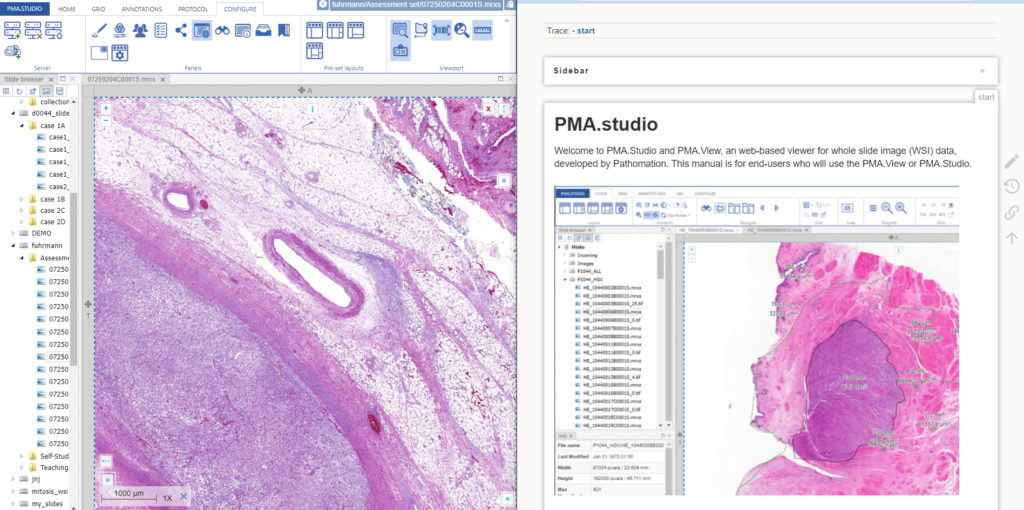
But soon your layout gets messy. The 50% screen width really gives too much to the wiki, and let’s not even get into how easy it is to have that other browser window snowed under a ton of other applications (the word processor you’re using to write a paper in, your ELN, your EPR, your LIMS…)!

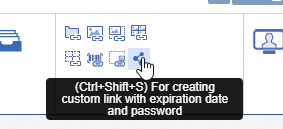
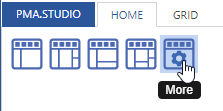
There’s a straightforward solution you. Click on the “More” button in the Layout group from the Home tab:

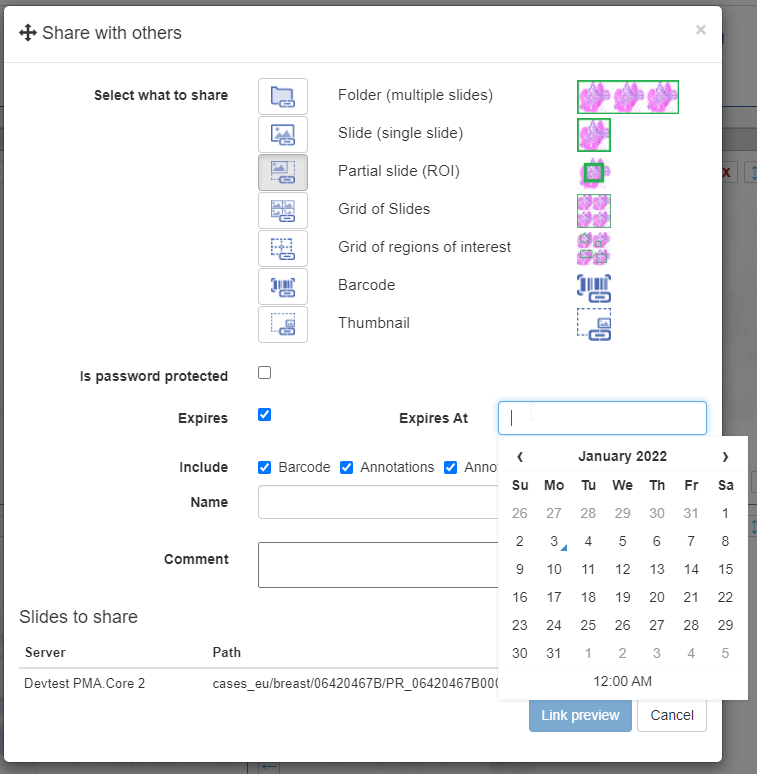
And a new dialog shows up. In addition to selecting any number of default panels, you can also define custom panels. Like so:

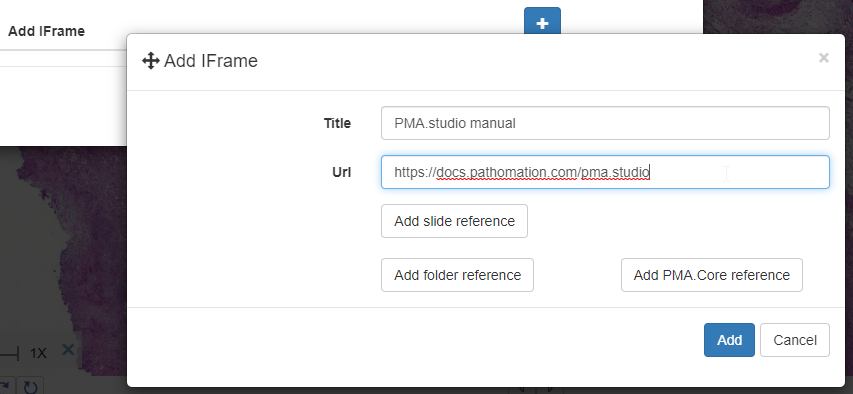
After clicking ok, your new panel appears, making your overall screen layout look like this:

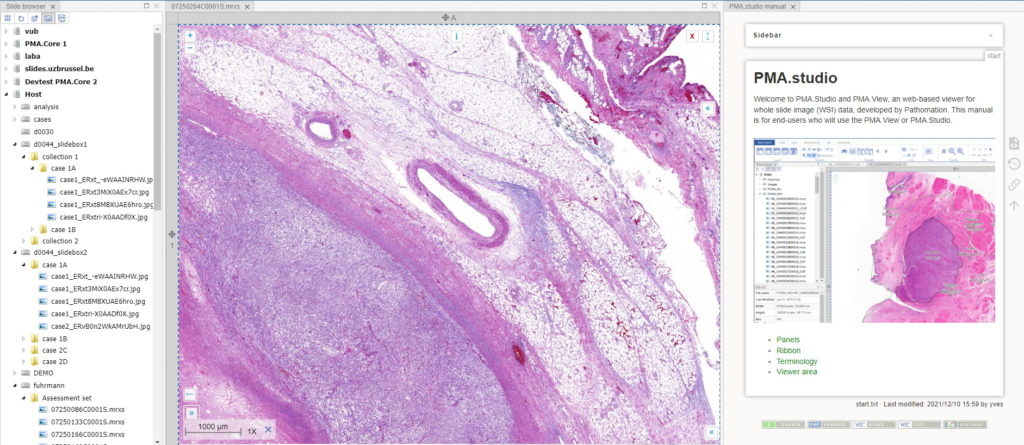
Now that’s more like it!

This is already great for reference data, but what if you want to combine this with slide awareness? In other words: you want to have the content in the panel change automatically depending on the selected slide.

Passing parameters

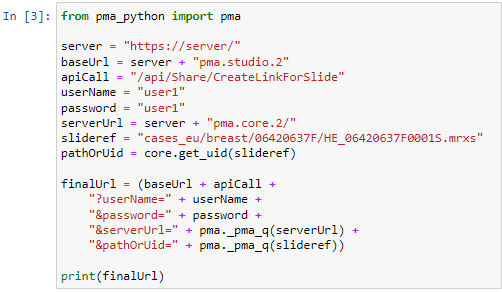
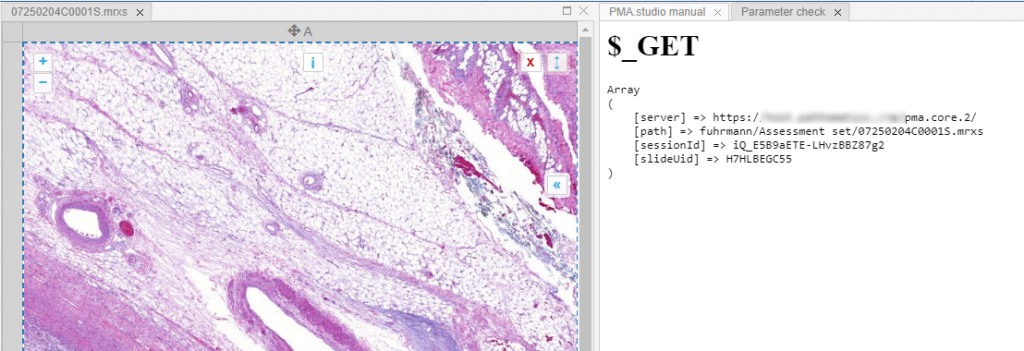
The custom panel mechanism in PMA.studio automatically passes along references to other webpages that trace back to a current PMA.core tile server and selected slide.

This mechanism is typically hidden from plain view to reduce the functional complexity of it all, but a single line of PHP brings up the necessary data:

print_r($_GET);

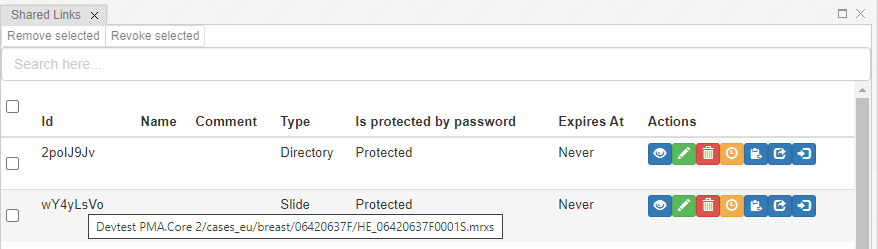
When we create yet another custom panel that refers to this new page, we see the following appear:

And let’s just say that we don’t like the way PMA.studio displays a slide’s thumbnail and label image. We’d rather just have those in separate panel, too, so we have more control over how they’re displayed.

We also know that the thumbnail of slide X can be reached via:

https://server/pma.core/thumbnail?sessionID=…&pathOrUid=X…

And the label image of slide X can be reached via:

https://server/pma.core/barcode?sessionID=…&pathOrUid=X…

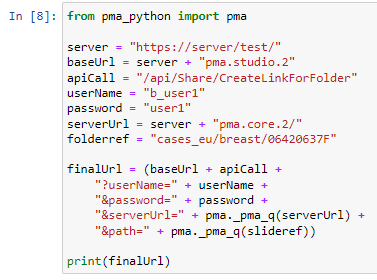
We can therefore make two new scripts, that translate the received input parameters from PMA.studio, and translates those to the correct querystring variables for our respective thumbnail and label images:

thumbnail.php:
<?php
$url = $_GET["server"].
	"thumbnail?sessionID=".$_GET["sessionId"].
	"&pathOrUid=".$_GET["slideUid"];
header("location: $url");
?>
barcode.php:
<?php
$url = $_GET["server"].
	"barcode?rotation=0&sessionID=".$_GET["sessionId"].
	"&pathOrUid=".$_GET["slideUid"];
header("location: $url");
?>

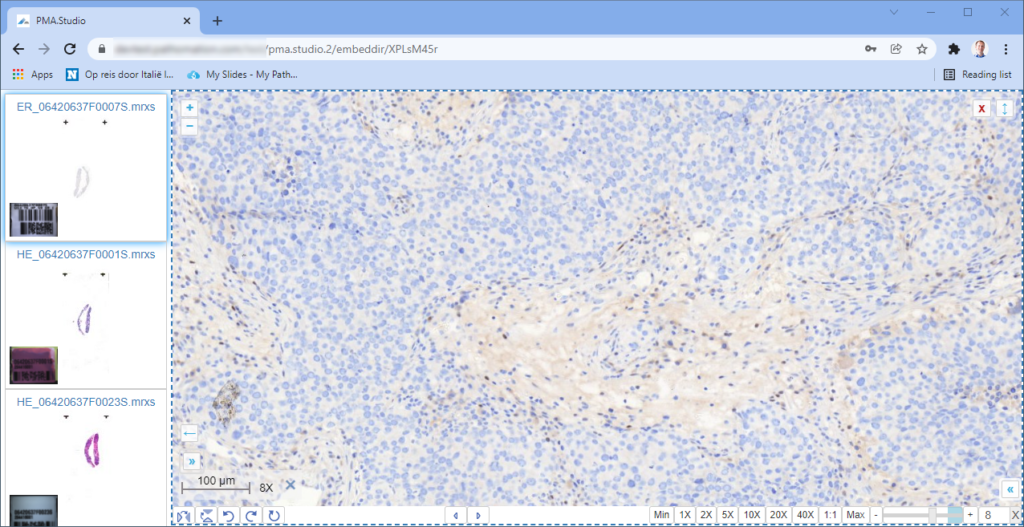
We place the new files on a server, and reference them via two separate custom panels:

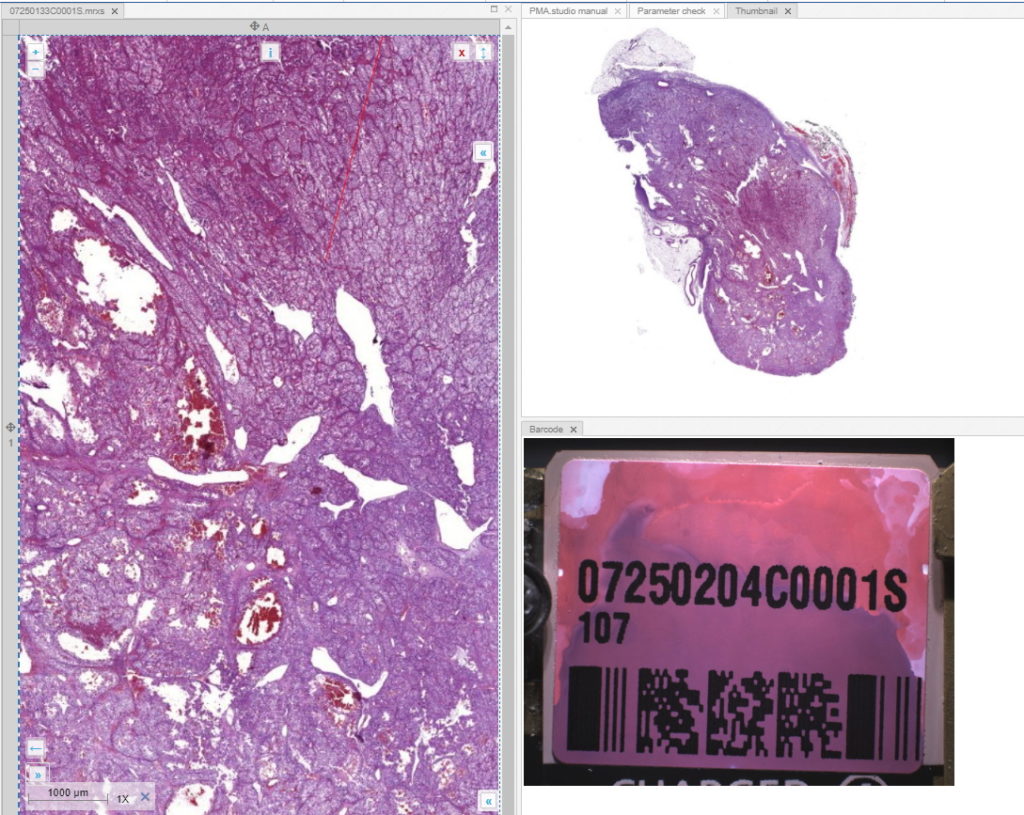
When we navigate the slides in a folder one by one, we now see that the panels are updated accordingly, too.

Other applications

In this post, we showed you how you can configure custom panels in PMA.studio exactly to your liking, and how the content of such panels can synchronize with currently viewed slides.

We showed you how to pass along information through some trivial examples, referring back to our own infrastructure.

Now you can build your interfaces, like we demonstrated in an earlier blog article.

PMA.studio is more than just a universal slide viewer; you can turn it into your own veritable organizational cockpit. Think e.g. about custom database queries against your back-end LIMS, bio-repository, or data warehouse. You can show the data where you want it, when you want it, all with a few configuration tweaks. No longer do you have to juggle multiple browsers, as PMA.studio simply allows you to build your own custom dashboards.

Find out more about PMA.studio through our landing page at https://www.pathomation.com/pma.studio.

Sharing facilities in PMA.studio

Let’s get together

Sharing content is arguably one of the most important applications of digital pathology, if not for the Web in general.

PMA.studio allows you to share content in a variety of ways. There is a dedicated group for sharing content on the ribbon:

When you just want to share what you’re currently looking at, chances are that you can get by with one of the quick share buttons:

  • If you want to share the current folder you’re navigating, click on the “Share folder” button
  • If you want to share the current slide that you’re looking at, click on the “Share slide” button
  • If you want to share the current grid that you’re looking at, click on the “Share grid” button
  • Etc.

If you want more control over what and how you’re sharing content, you can click on the final “Share” button of the group. You could say that that’s our “universal” share button.

It allows for further customization of your share link, including:

  • Password-protect your link
  • Expire the link (e.g. students can only access it for the duration of a test)
  • Include or exclude annotations from the shared link
  • Use a QR code instead of a plain text link
  • Etc.

Our best advice is for you to play with the various options. But do let us know when you think there are some features missing or you think something is broken.

Share administration

We’ve worked hard on making the sharing concept in PMA.studio broadly applicable to a variety of content. We’ve also worked on making it easy to share content.

So with all this sharing going on then, it’s only natural to be asking after a while “wait, what am I actually sharing?”.

On the configure tab, in the “Panels” group, you can active the “Shared links panel”

Once clicked, you get a new panel with an overview of everything you’ve shared so far.

The buttons behind each link allow various operations.

One application of this is to recycle a share link and re-use as you see fit.

You can also (temporarily) invalidate links, or delete them altogether.

The history is linked to your PMA.core login, so if at first you don’t see anything, make sure that you’re connected to the PMA.core instance for which you expect to see share links.

Monitoring

On the back-end of PMA.studio, administrators can get an overview of all created shares across all users. They can also use this view to temporarily suspend or even delete shares.

Automation

While we highly advocate the implementation of the PMA.UI framework in third-party software like (AP)L(I)MS, PACS, VNA, and other digital pathology consumers, we realize that this is not trivial. In a proof-of-concept phase, all you may want to do is show a button in your own user interface that then subsequently just pops up a viewport to the content that you want to launch. Easy-peasy, as they say.

Let’s say that you have an existing synoptic reporting environment that looks like this:

In order to convince your administration that adding digital pathology to it is a really good idea, you want to upgrade the interface to this:

With PMA.studio, you can now get exactly this effect.

Let’s switch to Jupiter to see how this works:

.First some homekeeping. We import the pma_python core module, and connect to the PMA.core instance that holds our slide.

Our slide is stored at “cases_eu/breast/06420637F/HE_06420637F0001S.mrxs”. Let’s make sure that the slide exists in that location by requesting its SlideInfo dictionary:

Alternatively, we can also write some exploratory code to get to the right location:

The PMA.studio API

Ok, we’ve identified our slide. Now let’s go to the PMA.studio. Unfortunately, PMA.python doesn’t have a studio module yet, so we’ll have to interface with the API directly for the time being.

The back-end call that we need is /API/Share/CreateLinkForSlide and takes on the following parameters:

We create the URL that invokes the API by hand first. We can do this accordingly:

Never mind that pma._pma_q() method that we use. It’s a fast and easy way for ourselves to properly encode HTTP querystring arguments. You’re free to piggy-back on ours, or use your own preferred method.

After execution of the code, you get a URL that looks like this:

https://yourserver/pma.studio.2/api/Share/CreateLinkForSlide?userName=user1&password=user1&serve.rUrl=https%3A%2F%2Fyourserver%2Fpma.core.2&pathOrUid=IRVGLPWBFT

The URL by itself doesn’t do anything, but create the share link. So you still need to invoke it. You can do this by either copying the URL to a webbrowser, or by invoking it from Python as well:

Again: it’s the return result from the URL that you want to distribute to others and not the initial URL.

To confirm that it worked, you go back to PMA.studio and check your panel with the share link overview:

But you can also just pull up the resulting URL in a new browser window:

Yay, it worked!

Automating folders

You can also create links that point to folders.

That slide that we just referenced? It turns out to be an H&E slide, and along with the other slides in the folder, actually comprises a single patient case.

So you can emulate cases by organizing their slides per folder, with each folder representing a case. Your hierarchy can then be:

[patient]

    [case]

        [slides]

Say that we want to offer a case-representation of breast cancer patient 06420637F. We use Share/CreateLinkForFolder and point to a folder instead of a slide:

The result again appears on the PMA.studio side. And clicking on it results in a mini-browser interface:

What’s next

After PMA.core, we’re starting to provide back-end API calls into PMA.studio as well. Even though as we prefer developers to integrate with PMA.UI directly, there are scenarios where automation through PMA.UI makes sense. When you’re in one of the following scenarios when:

  • PMA.studio is your main cockpit interface to work with slide content, but there are a few other routes (like an intranet) through which you want to provide quick access to content, too.
  • You have an (AP)LI(M)S, PACS, VNA, or other system and you’re in a PoC phase to add digital pathology capabilities to your own platform, PMA.studio automation may be a quicker route to go than adapting our SDKs.

Do keep in mind however that we’re providing the PMA.studio back-end mostly for convenience, at least for the time being. There are any number of ways in which you may want to integrate digital pathology in your infrastructure and workflows. For a high level of customization, you’re really going to have to move up to PMA.UI, as well as a back-end counterpart like PMA.python, PMA.php, or PMA.java.